Shopping cart
$0.00
Do you have a vintage quilt tucked away in a closet… but you’re almost afraid to touch it? Maybe it belonged to your grandma. Or you found it at an antique shop and fell in love. Either way, vintage quilt tops are special and that’s what makes them a little intimidating. You might notice fading, yellowing, brittle fabric, or even small tears forming over time. And then the big question hits: “What if I ruin it trying to fix it?” I get it. Washing and repairing something that has survived decades feels scary. But here’s the truth. Vintage quilts need gentle care to survive.
In this post, I’ll walk you through:
Let’s start with the part that makes everyone nervous…
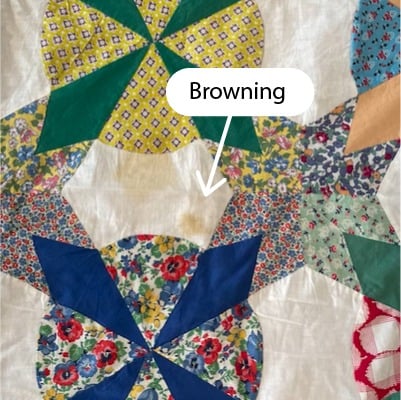
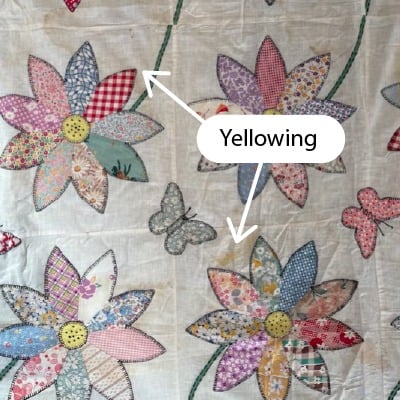
I know. It feels wrong. But over time, quilts accumulate dirt, oils, dust, and something called lignin. Lignin is a natural compound found in plant-based materials (like cotton). When it oxidizes, it causes yellowing and browning. That’s why old books, newspapers, and fabrics start to discolor. Over time, lignin doesn’t just stain fabric, but it weakens it. The fibers slowly become brittle and are more likely to tear. So washing your vintage quilt top helps remove buildup and slow down deterioration.
I had two vintage quilt tops; one had noticeable browning, and the other had yellow stains. Here’s exactly what I did to get rid of that.
Fill your bathtub with:
Lukewarm, room temperature, or cold water
(Avoid hot water — it can cause color bleeding.)
Add about four scoops of a mild detergent. I used OxiClean, but any gentle detergent can work.
Place the quilt top in the water and gently move it around to fully saturate the fabric. Then let it sit for 6–8 hours. I was honestly shocked at how much dirt and grime came out.
Drain the tub and refill with clean water. Rinse carefully. You can repeat this process until the water runs clear. Do not wring or twist the quilt. Vintage fibers are already fragile, and twisting can snap seams or break fibers. Gently knead your quilt to push out the excess water.
The safest method? Lay it flat to dry outside or indoors on a clean surface. Now here’s my controversial confession… because it is winter I tested one quilt in the dryer on delicate. I ran it by itself and checked it constantly. No loose stitching. No fabric pilling. No damage. So I did the rest of the quilts individually, on delicate, and had to run each one twice to get fully dry. Use at your own discretion.
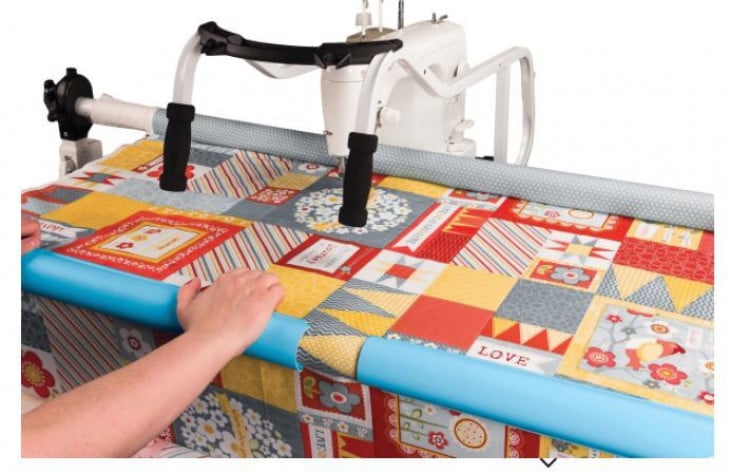
If you’re repairing a finished quilt with seam damage, we have a full step-by-step tutorial on YouTube that walks you through that process. Now let’s talk about repairing unfinished quilt tops.
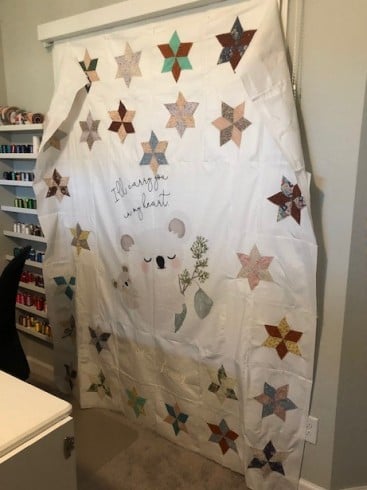
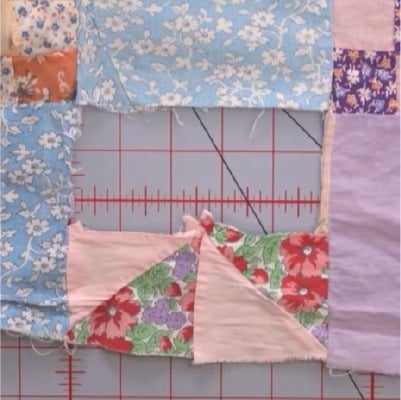
On one quilt top, the fabric was literally crumbling when I touched it. In this case, replacement was the only option.
Because the damaged pieces were small half-square triangles, I measured them using my TrueCut 6.5" Square Ruler. The triangles measured 2.5". I added ½" for seam allowance, so I cut a 3" square on my new fabric and then cut them diagonally.
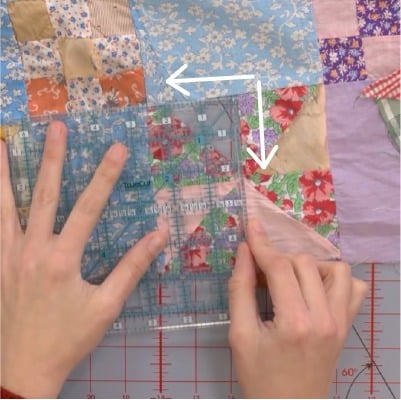

Since I was missing two triangles, I seam ripped the damaged area and about one inch into the adjacent seam. This gives you room to work and reattach cleanly.
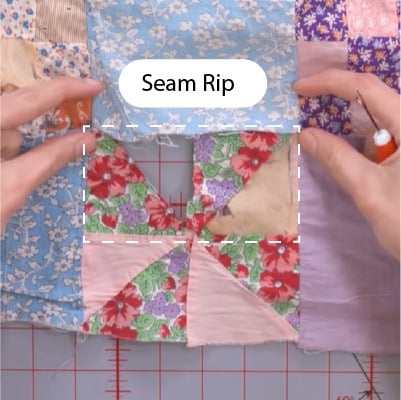
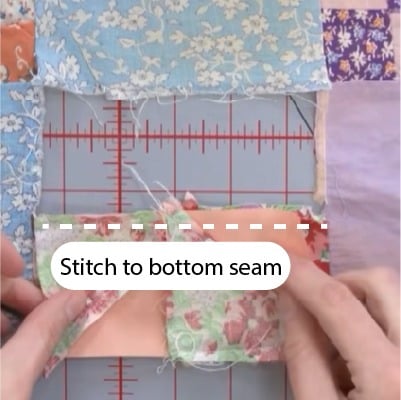
After seam ripping, press the remaining fabric flat. Then, stitch the replacement triangles together to form your rectangle, ensuring that each time you sew pieces together, the right sides (tops) face each other. Finally, press those seams open.
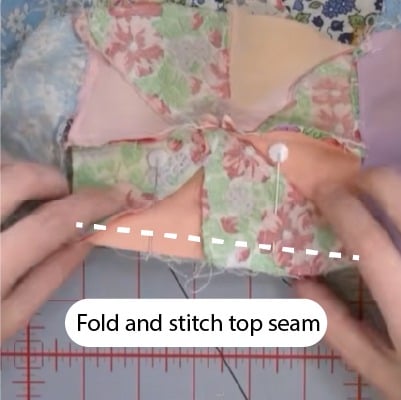
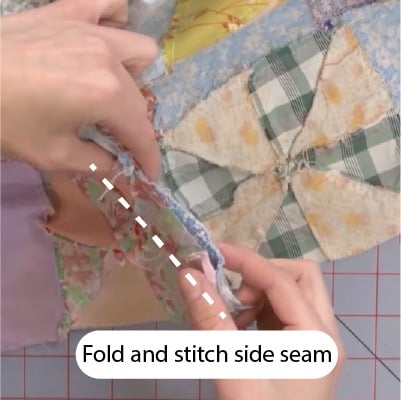
When you’re ready to reinsert the piece, start by pressing the surrounding seams open and double-check that all your fabric is facing the correct direction before attaching it. Begin with the bottom seam, sewing it back into place using a ¼" seam allowance, then fold your quilt top up and stitch along the top seam. Finish by folding the fabric into position and carefully stitching both side seams—taking your time here will help ensure everything lines up smoothly.
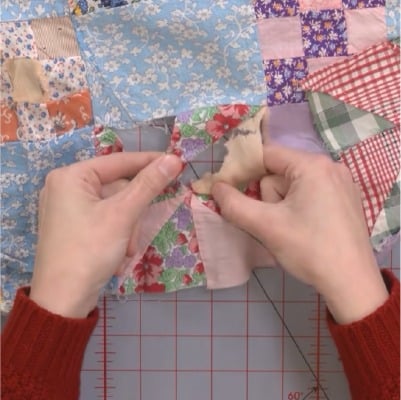
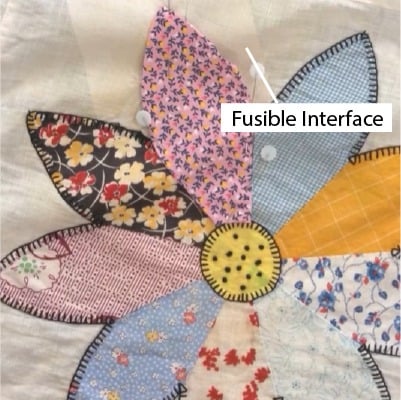
The other quilt top is made entirely of appliqué, and I had a piece that broke off. Trying to replace the background fabric would have been very noticeable and make the fix stand out too much. Instead, I used lightweight fusible interfacing behind the damaged area.

Here’s how:
Yes, you can see the interfacing from the back. But I’d rather see stabilizer than watch fabric continue to deteriorate. You may notice slight darkening in the white fabric after pressing, likely due to oxidation reacting with heat. You can use the washing method earlier in this post to help reduce discoloration.
For a torn purple appliqué piece, I didn’t want to seam rip the entire leaf and risk damaging surrounding stitches. Instead, I decided to placed new fabric under the original. First, I used my new fabric and laid it over the torn piece to trace the shape using a fabric marking pen. Then I gave it a rough cut with ¼" seam allowance.

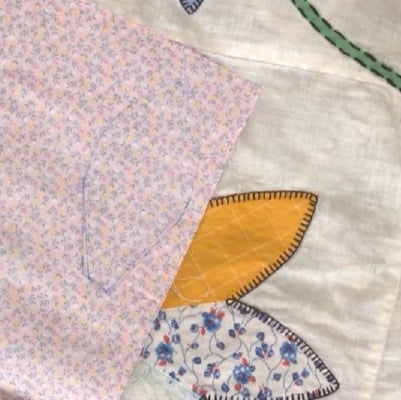
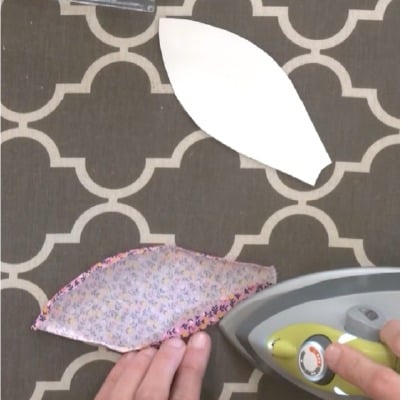
Since the original piece was turned appliqué, I traced the shape onto paper and cut out a template. I then placed the template onto my fabric. Using the paper as a guide, I folded the fabric edges over the template and pressed them in place to create clean, crisp folds.
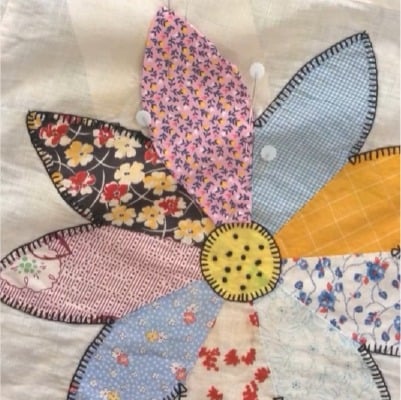
I positioned the new piece into place and secured it using a ladder stitch (so stitches were invisible). Then, to match the rest of the appliqué, I finished with a decorative blanket stitch.
If your quilt top is very thin and you can see batting through it, consider adding a layer of white fabric beneath it before quilting. In this case, your layers will go in the following order: backing, batting, white support fabric, and then the quilt top. The added white fabric helps strengthen the quilt, brightens the overall appearance, and prevents the batting from showing through. It’s a simple step that can make a huge difference in your finished project.
With gentle washing, thoughtful repairs, and a little patience,you can extend the lives of your vintage quilts for many more years. Don’t let fear keep you from caring for them. Test slowly. Work carefully. And remember, preserving a quilt is honoring the hands that made it. If you’re interested in the tools I used, you can find them below:
If you need additional tips on repairing a vintage quilt top, check out our YouTube video. And be sure to follow along for more projects and quilting tips on our social media.

For over 25 years the Grace Company has been the leading manufacturer of high quality quilting frames and quilting accessories. What truly sets The Grace Company apart from other competitors is its level of quality, value, and experience toward all their endeavours. From products to external and internal customer experience, the Grace Company responds to market and customer needs and continues to lead the quilting industry. Grace Company frames and hoops are designed to be easy to build and compatible with most major quilting machines. They'll have the quilting product you need.