Shopping cart
$0.00

Wonky stars are a fun way to take a break from precise cutting and measuring. This project is perfect for using up your scraps, whether you want a scrappy, mismatched look or you'd rather build it around a single fat quarter. It's also easy to modify, which makes it a great pick for type B quilters who like to plan a little or a lot.
For my finished quilt, I used QCT6 Pro and imported the design I wanted to quilt it with. That process is simple, and I'll walk you through it later in this post. But first, let's get started on the wonky star blocks.
One of the best things about this pattern is that you can make it any size you want. Just pick your block size before you start. I went with 5 inch squares, which is also a great excuse to use up a charm pack for your center and background squares. You could just as easily go smaller, like 3 inch squares, if you want a more scrappy, detailed look.
For each block, you'll need:
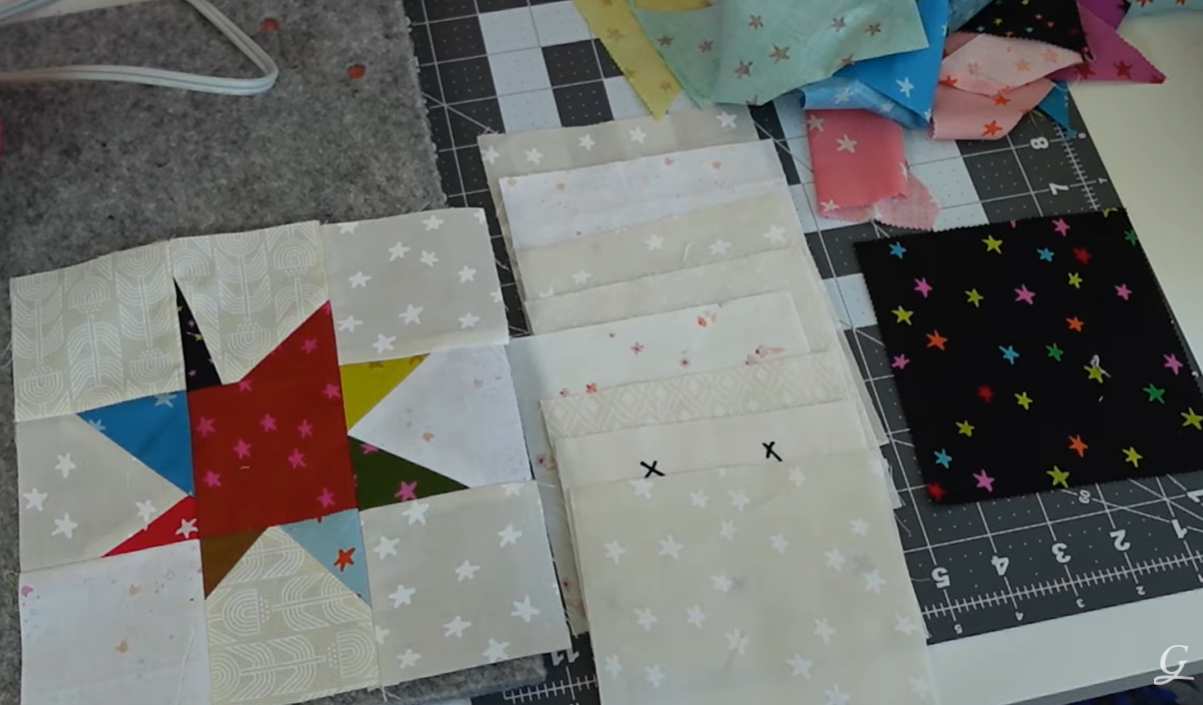
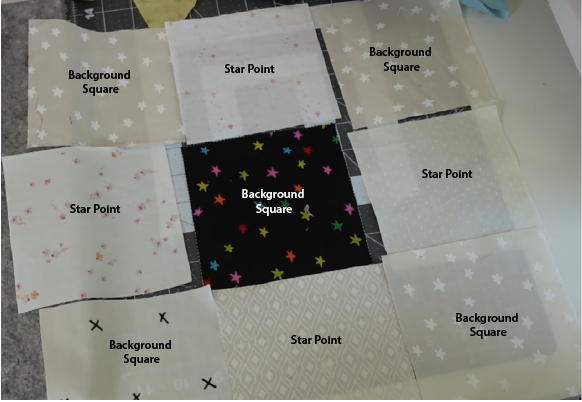
The background and center squares should all be the same size (5 inches, in my case), but the scraps for your star points can be cut to whatever size you like since you'll be trimming them down as you go. Four of your background squares will form the corners of the block, and the other four are what you'll use to piece your star points. If you're more of a visual learner, check out our YouTube tutorial for a full walkthrough on how to make the wonky star block.
Step 1: Lay it out
Start by laying out your background squares and deciding which one will be your center block. The remaining squares are where you'll add your star points.
Step 2: Add your first star point
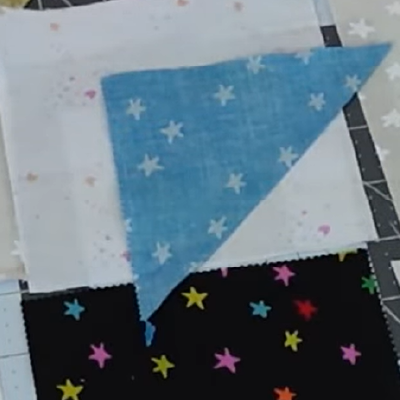
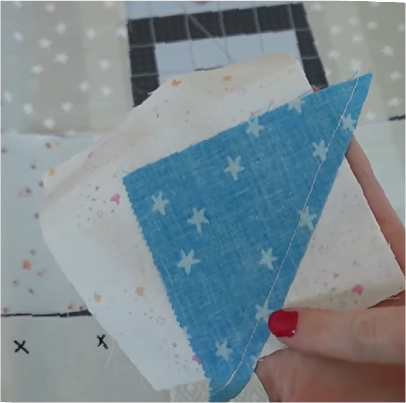
To make a point, place a scrap piece right sides together on a background square, positioned diagonally across one corner. Sew a quarter inch seam in from the edge of the scrap. You can play around with the placement and angle, just make sure the scrap fully covers the corner of the background square, since you'll trim it back to size afterward.
Step 3: Trim and press
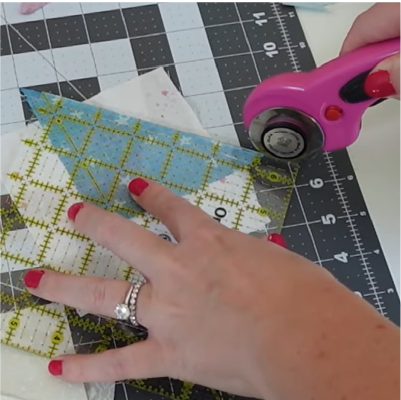
Once you've sewn on a point, grab your rotary cutter and trim away the excess fabric, leaving a quarter inch seam allowance. Press the seam open, then trim the block back to a clean 5 inch square.
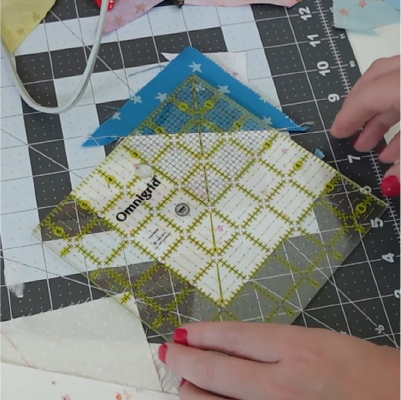
Step 4: Add a second point
Repeat this process to add a second point to the same square, using a new piece of scrap fabric. This is where you can really have fun: try thin, sharp points or longer, more dramatic ones. There's no wrong way to do it! Once both points are sewn and trimmed, lay the square next to your center block to see how the layout is coming together. Repeat the entire process for the remaining three background squares.
Bonus: those trimmed-off triangle scraps are perfect for foundation paper piecing later, so save them if you can.
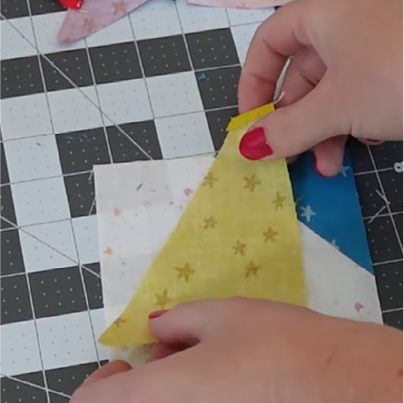
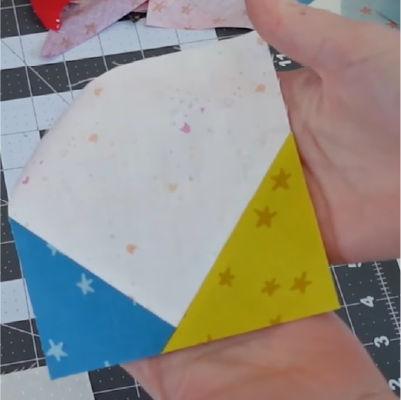
Step 5: Assemble the block
With your four-point squares complete, arrange your pieces with the center square in the middle and a point square on each side. Once you're happy with the layout, sew the squares together into rows, then press your seams. For the outer rows of my block, I pressed the seams in the same direction, and for the middle row, I pressed them the opposite way. This lets the seams nest together neatly when you stitch the rows into the block.
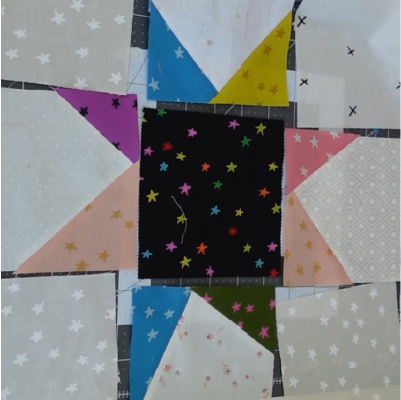
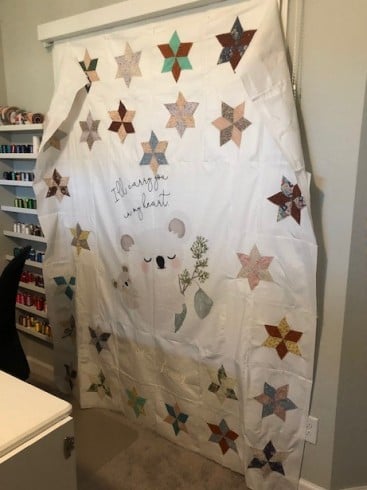
For my quilt, I made 36 wonky star blocks and arranged them in a 6 by 6 layout. With 5 inch squares, each finished block came out to 13.5 inches, giving me a finished quilt top that measures 81 by 81 inches.
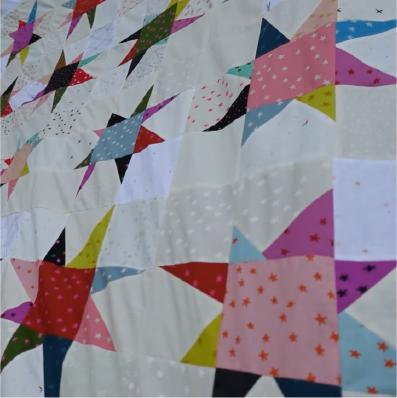
With the top pieced, it's time to quilt it. I used a pantograph design that wasn't part of QCT6's built-in library, so I'll walk you through how to upload your own design. If you'd rather see it in action, check out our YouTube tutorial for a visual walkthrough.
Here's how to get it into QCT6:
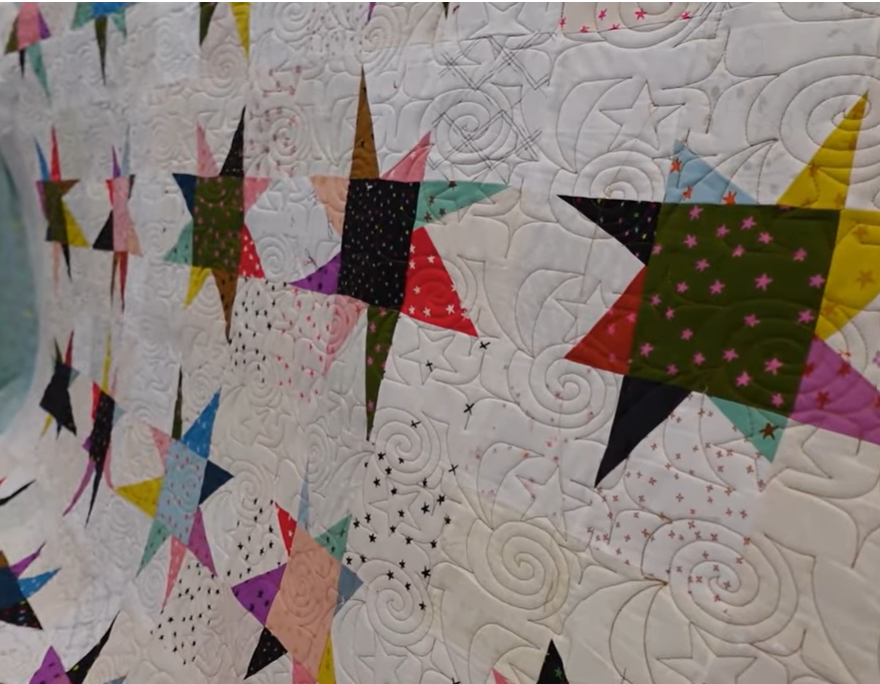
And that's it. A whole quilt built from scraps, a little wonkiness, and QCT6 Pro doing the precision work for you. It's proof that you don't need a perfectly matched fabric stash to make something you'll want to keep on your bed for years.
Products used in this project:
If you loved this project, we've got plenty more where that came from. Follow us for free on YouTube or Instagram for new patterns, quilting tips, and what's coming next from Grace Company.

For over 25 years the Grace Company has been the leading manufacturer of high quality quilting frames and quilting accessories. What truly sets The Grace Company apart from other competitors is its level of quality, value, and experience toward all their endeavours. From products to external and internal customer experience, the Grace Company responds to market and customer needs and continues to lead the quilting industry. Grace Company frames and hoops are designed to be easy to build and compatible with most major quilting machines. They'll have the quilting product you need.