Blog

Our Latest News

How to Make a Sawtooth Star Quilt Block

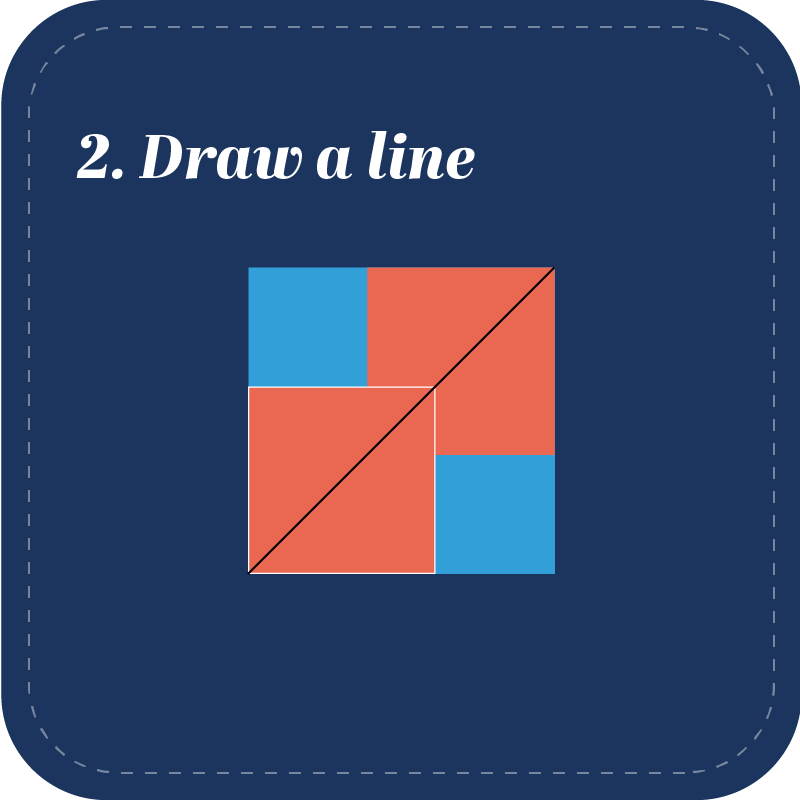
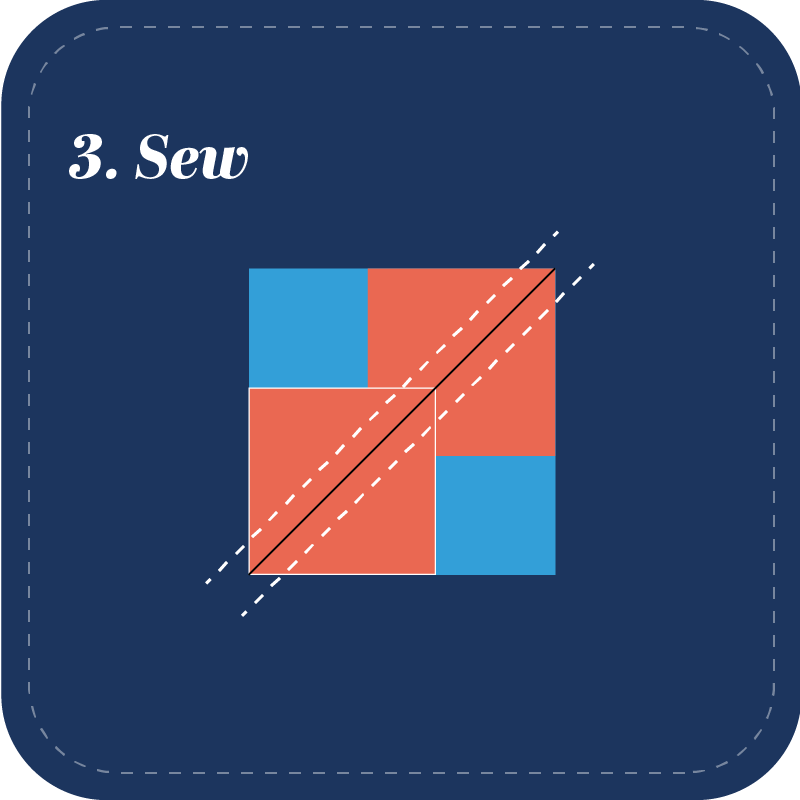
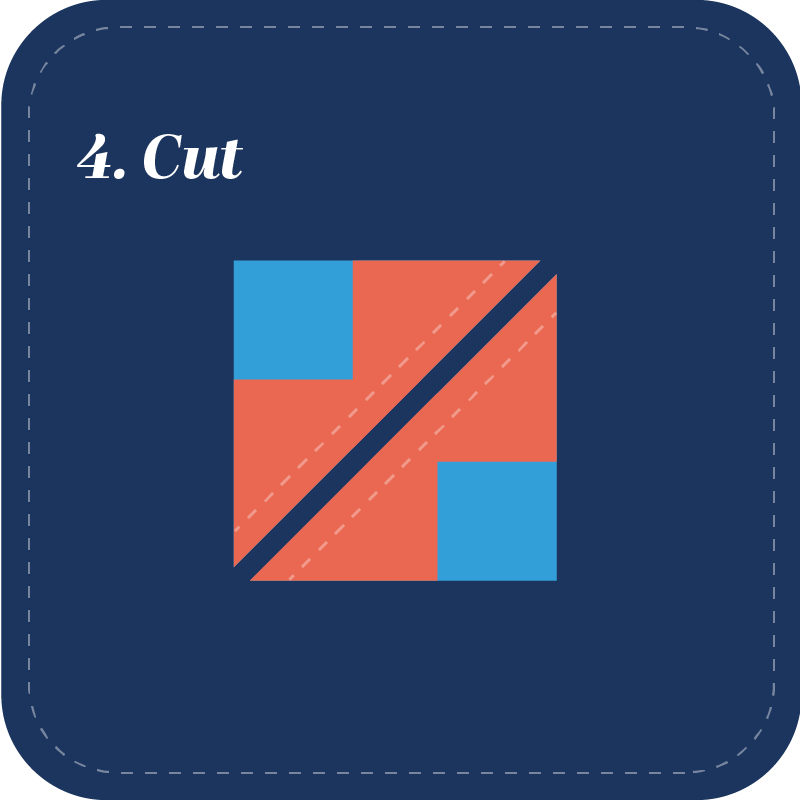
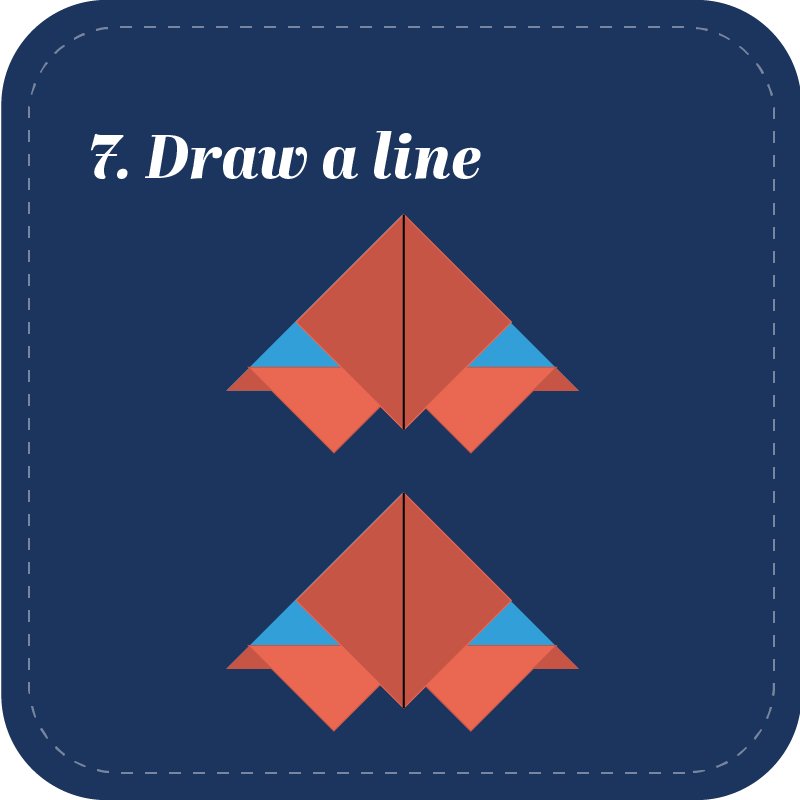
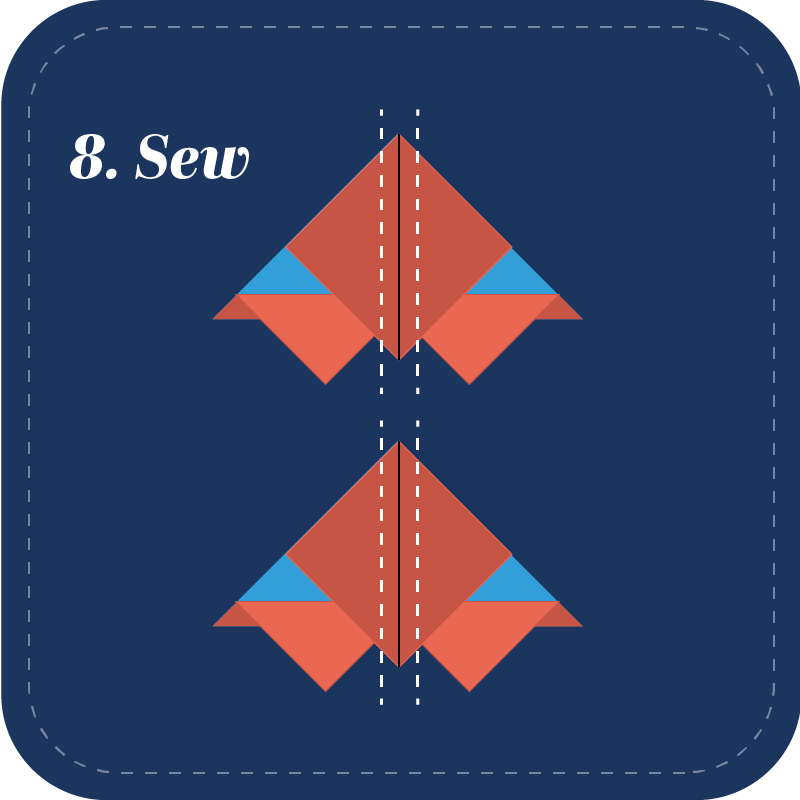
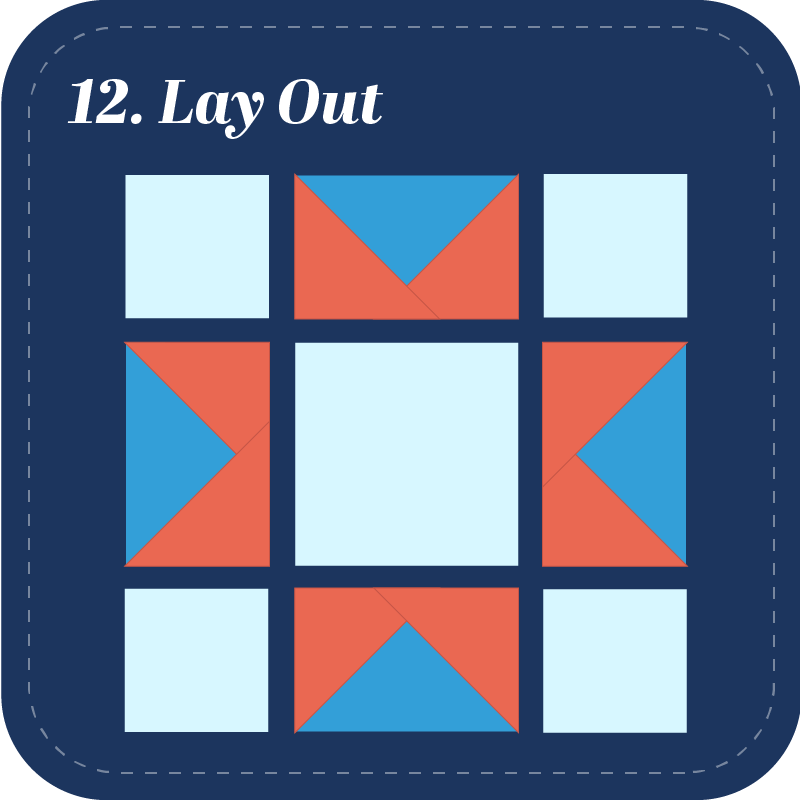
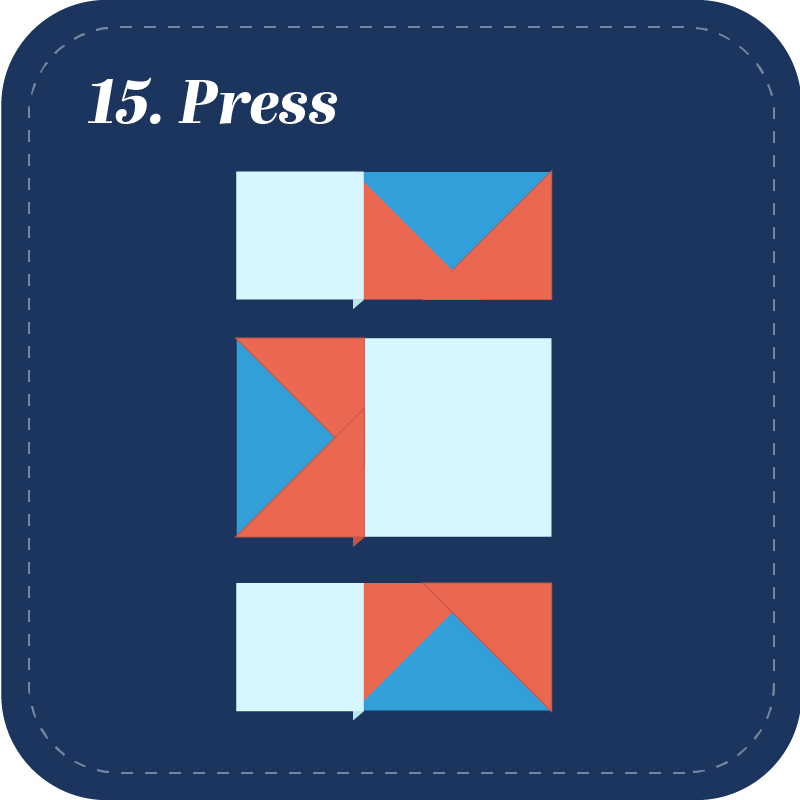
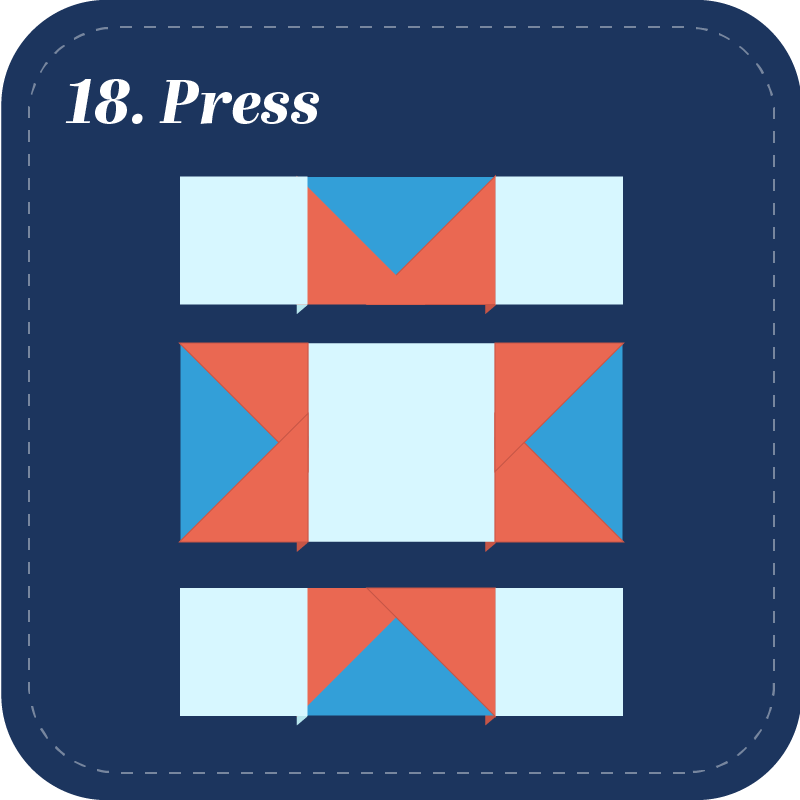
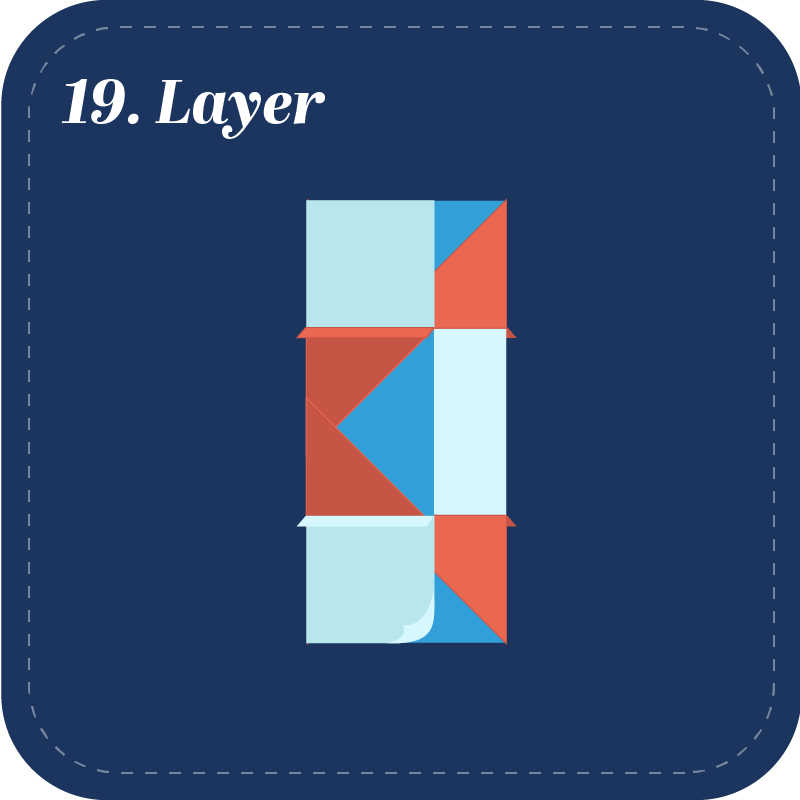
Making a sawtooth star block happens in two parts. For every sawtooth star, you'll need to piece together four flying geese first. In this step-by-step guide to making your own sawtooth star (or evening star, or morning star, or variable star, or north star—choose your preferred name), we'll walk you through how to make flying geese four at a time, and how to use them to create a sawtooth star block. 

This block is relatively simple and straightforward, but its intricacy makes it a worthy addition to any quilt, whether you're just starting out with quilting or you're a quilting pro looking for an excuse to break out your longarm quilting machine. Use different combinations of fabrics to give this block new life, or stick to the classics. It's a stand-out block either way. If you're looking for another block to pair with this one, check out our blog on how to make an economy quilt block

Stars are the perfect accent on any quilt—a baby blanket for a new relative or a bedspread for the guest bedroom. According to Jane Galley's writeup on the history of the sawtooth star, Native American quilters used the sawtooth star in gifts for newlyweds or babies or warriors because the star is a sacred symbol in their culture. 


The Fabric You'll Need to Make a Sawtooth Star Quilt Block

The Sawtooth Star Block Size Chart Cheat Sheet

What You'll Need: Fabric infographic

Flying Geese Size Chart      Sawtooth Star Block Size Chart

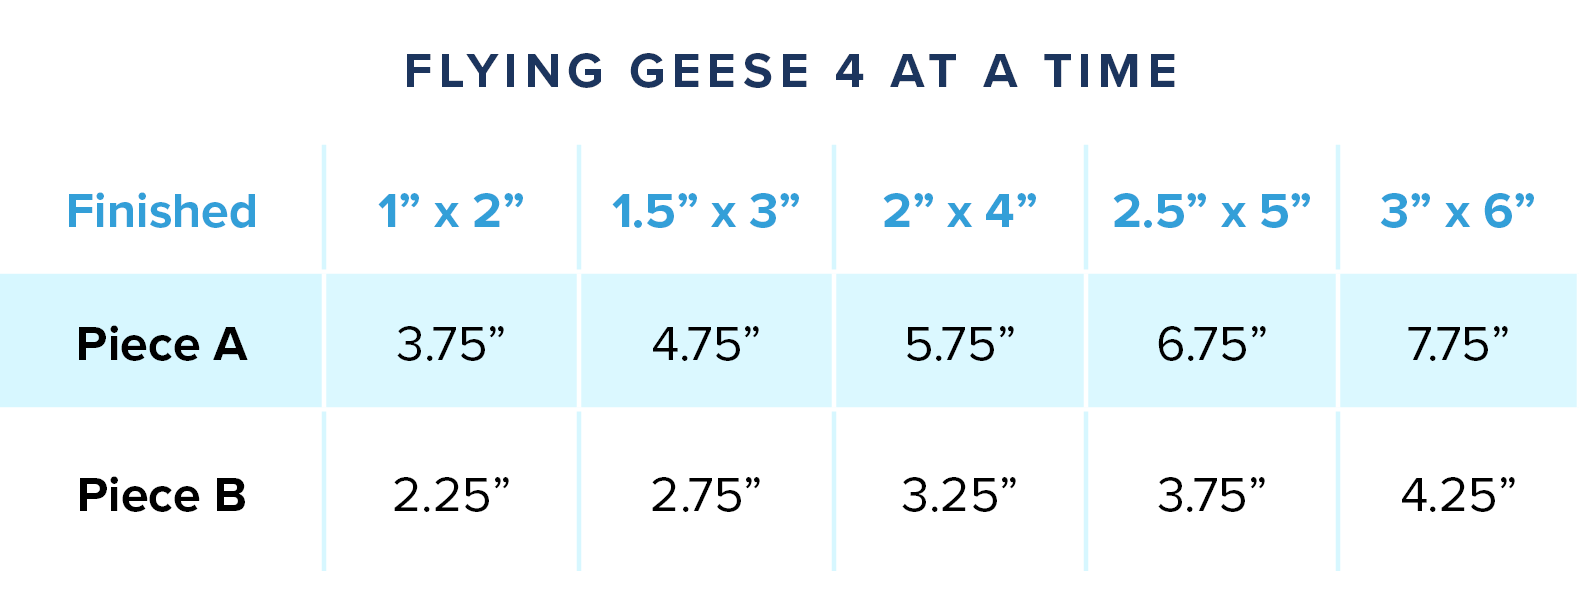
TIP: Choose your finished block size on the sawtooth star cheat sheet first, then use the corresponding flying geese dimensions on the "Flying Geese 4 at a Time" cheat sheet.  


Step-by-Step Instructions to Sew a Sawtooth Star Block

Step 1: Layer

  • Layer two of the "B" squares onto two opposing corners of the "A" square. 

Step 2: Draw a line

  • Draw a line from one of the layered square's corners to the opposite, dividing the shape in half diagonally. 

Step 3: Sew

  • Sew a 1/4" seam on either side of the line you've drawn.

Step 4: Cut


Step 5: Press

  • Press the triangles resulting from the B squares out to make the shape shown in the image above.

Step 6: Layer

  • Layer the remaining two B squares on top of the resulting shape. 

Step 7: Draw a Line

  • Draw another two lines dividing the B squares and the shapes underneath in half. 

Step 8: Sew

  • Sew 1/4" seams on either side of the lines you've drawn.

Step 9: Cut


Step 10: Press

  • Press the triangles resulting from the B squares out to make the shapes shown in the image above.

Step 11: Trim

  • Trim the seam edges beyond the boundary of the flying geese rectangles. 

Step 12: Lay Out

  • Lay out the flying geese and the "C" and "D" squares in the pattern shown above.

Step 13: Layer

  • Take the two left columns of the pattern and fold the furthest left column on top of the center column like a book, lining up the edge.

Step 14: Sew

  • Sew a line 1/4" from the layered edge.

Step 15: press

  • Press the seams to one side so that the resulting shapes lay flat.

Step 16: Layer

  • Take the remaining column of pieces and fold them on top of the center column like a book, lining up the edge.

Step 17: Sew

  • Sew a straight line 1/4" from the layered edge.

Step 18: Press

  • Press the seams to one side so that the resulting shapes lay flat.

Step 19: Layer

  • Take one of the pieces and fold them on top of the center piece like a book, lining up the edge.

Step 20: Sew

  • Sew a straight line 1/4" from the layered edge.

  • Press the seams to one side so that the resulting shapes lay flat.

Step 22: Layer

  • Take the last fabric piece and fold it on top of the other shape like a book, lining up the edge.

Step 23: Sew

  • Sew a straight line 1/4" from the layered edge.

Step 24: Press

  • Press the seams to one side so that the resulting shape lays flat.


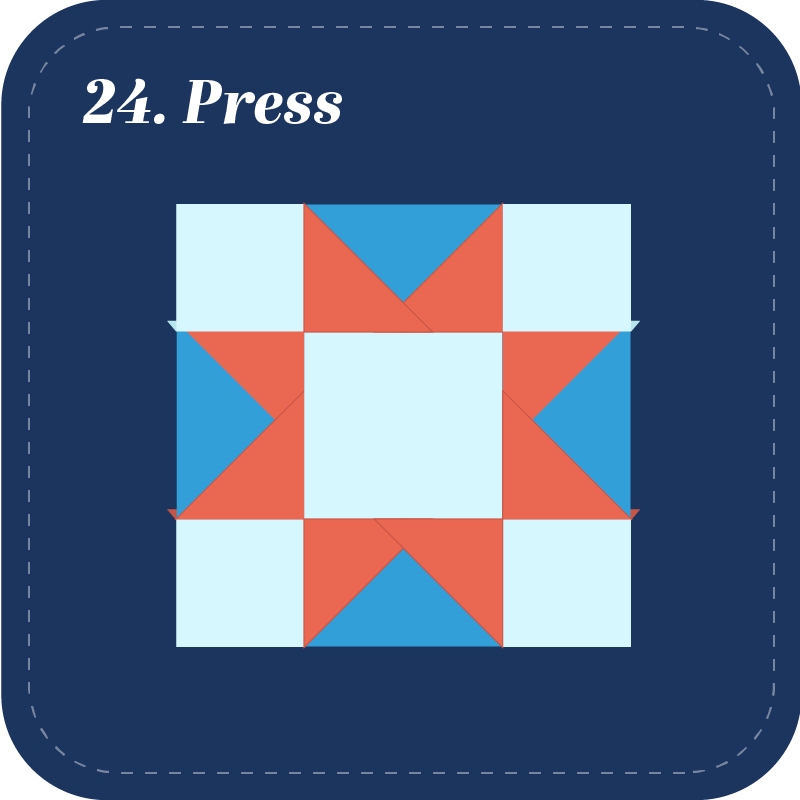
With that, you've made a sawtooth star! Now go ahead and make another one—or whatever other block you think would pair nicely, and create a gorgeous quilt top. May you make something beautiful that you can gift or keep or pass down for years to come. 

Share this Post:

Posted by The Grace Company

logo

For over 25 years the Grace Company has been the leading manufacturer of high quality quilting frames and quilting accessories. What truly sets The Grace Company apart from other competitors is its level of quality, value, and experience toward all their endeavours. From products to external and internal customer experience, the Grace Company responds to market and customer needs and continues to lead the quilting industry. Grace Company frames and hoops are designed to be easy to build and compatible with most major quilting machines. They'll have the quilting product you need.

Related Posts: