Shopping cart
$0.00
There’s just something so special about decorating your home with handmade quilts, especially during the winter season. A quilted table runner is one of the easiest ways to add warmth, texture, and personality to your space without committing to a full quilt.
If you’re a beginner quilter, this project is the perfect place to start! It uses simple piecing, a classic 9-patch block, and a layout that looks impressive without being complicated.
One of my favorite aspects of this table runner pattern is its ease of customization. Swap out the fabrics, and suddenly you have a runner for Christmas, Halloween, springtime, or even everyday décor. It’s such a fun way to practice quilting skills while creating something beautiful and useful.
In this tutorial, I’ll walk you step by step through how to make a fun and beginner-friendly quilted table runner. The full pattern and products will be linked at the bottom of this post!
Before we start cutting, let’s gather everything you’ll need.
Fabrics (3 coordinating colors):
Other Supplies:
Tools:
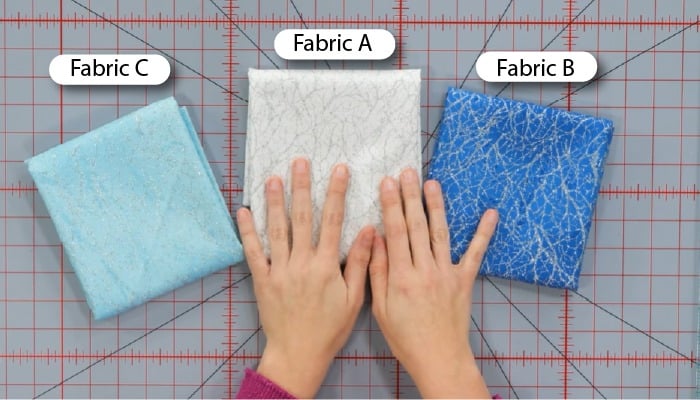
For this table runner, I’m using three fabrics: two sparkly blues and a white fabric from the Grace Fabric Store located in West Jordan, Utah. To keep everything organized, I labeled my fabrics as A, B, and C, which makes the cutting and layout steps much easier to follow.
We’ll be making 9-patch blocks, so the first step is cutting our fabric. To save time, we will cut everything we need upfront, including strips, squares, triangles, and border pieces.

Step 1: First, start by squaring off your fabric to create a clean, straight edge. Then, we will be cutting 2-inch-wide pieces to the length of the fabric. These pieces will be used to create our 9-patch blocks.
Use the graphic below to help follow along during these steps.
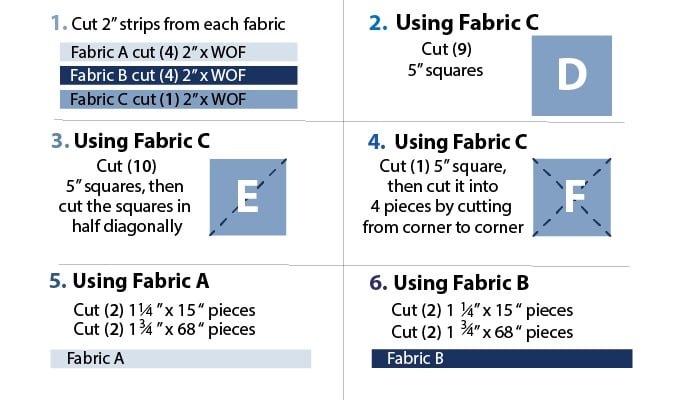
Next, we’ll cut the pieces that will fill in the background and corners of the runner.
Step 2 (D). Using Fabric C, cut (9) 5-inch squares. Set these aside for later.
Step 3 (E). Using Fabric C, cut an additional (10) 5-inch squares, then cut them diagonally to create (20) triangles total.
Step 4 (F). For the four outer corners of the table runner, cut: (1) 5-inch square using Fabric C. Then, cut that 5-inch square into (4) triangles by cutting diagonally from corner to corner. Set these corner triangles aside for later.
I decided to add a double border to my table runner to give it extra width. This step is completely optional, but borders are a great way to frame your table runner!
Steps 5 & 6. If you choose to add a border, you will need to cut:
Set these aside for later.
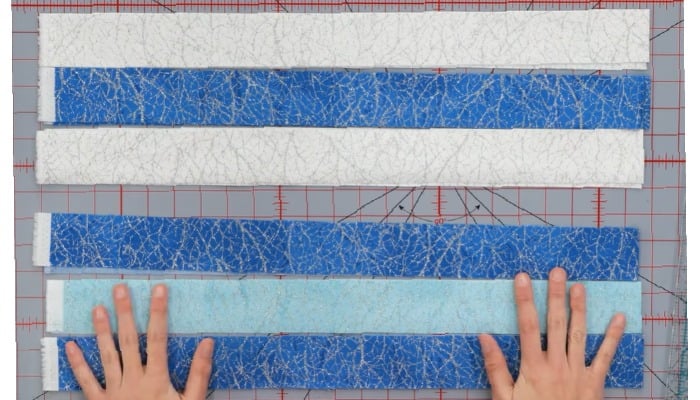
Now that all of our fabrics are cut, it’s time to piece them together to make a strip. Lay three pieces together with alternating colors.
For my runner, I used these combinations:
Next, place your fabrics right sides facing and sew along the long edge. To speed things up, I recommend chain piecing:
*Chain piecing is a quilting technique where you sew multiple fabric units continuously without cutting the thread between them, saving both time and thread.*
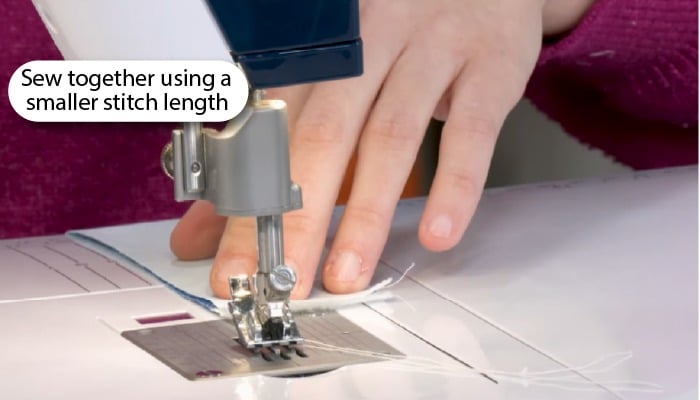
After sewing all of your strips, press your seams flat.
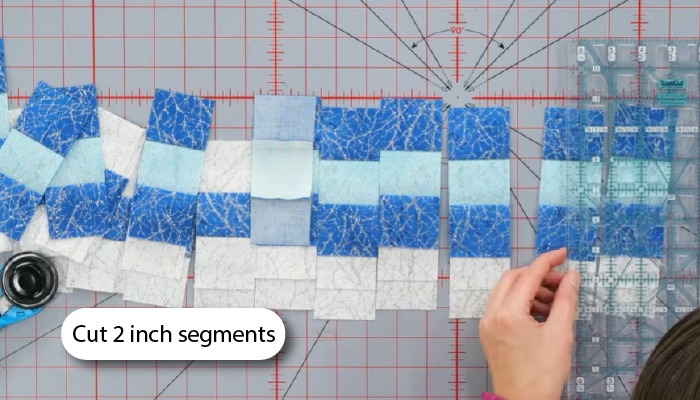
Now it’s time to cut the strips into smaller pieces.
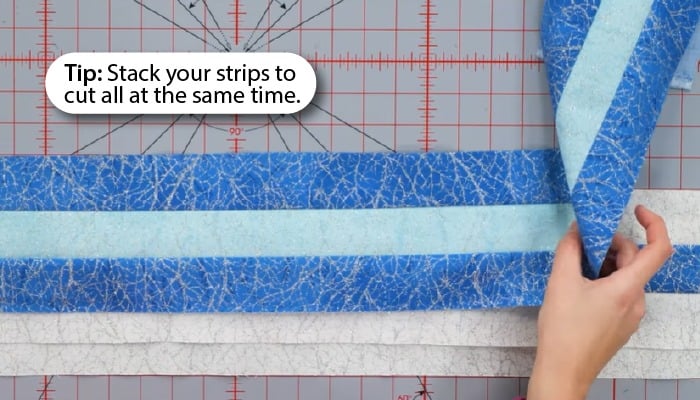
I’m all about working smarter, not harder, so here’s my little shortcut! You can stack strips slightly offset from each other and use the lines on your cutting mat as a guide cut them all together at once. Before you start cutting, square off the edge of the fabric again, then begin to cut 2-inch segments. You should end up with about 20 pieces per strip. Once everything is cut out, sort your segments into matching piles. This will make the next step much easier!
Now we can turn those pieces into 9-patches!
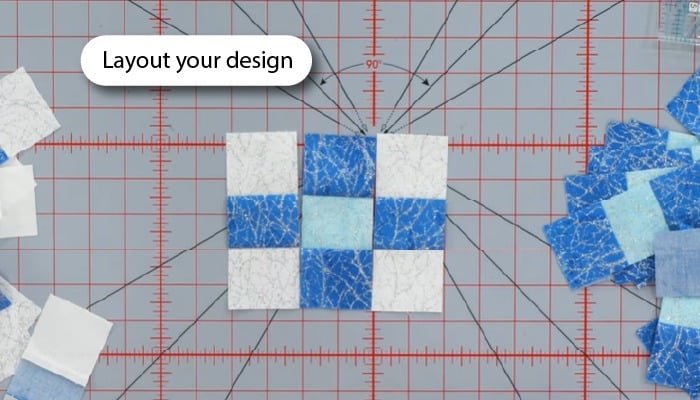
Using 3 of the segments we just cut, lay them out to form the block design. Once everything looks right, sew them together, then press the seams open. You will be making (20) nine-patch blocks. Your nine-patch blocks will measure 5" unfinished.
Remember those background pieces we set aside? Now it’s their time to shine!
Lay out your design like this:
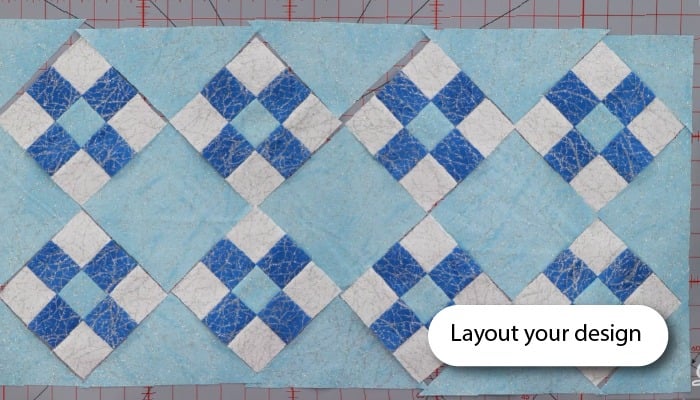
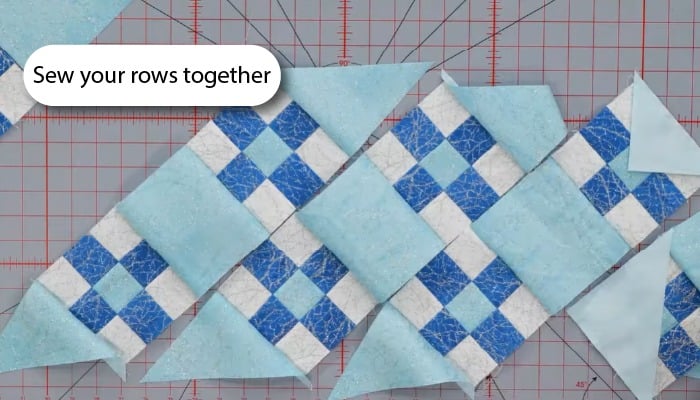
Once we have our design laid out, we’ll pin and sew everything together into diagonal rows. Tip: Stack your rows in order to avoid mixing them up when sewing!

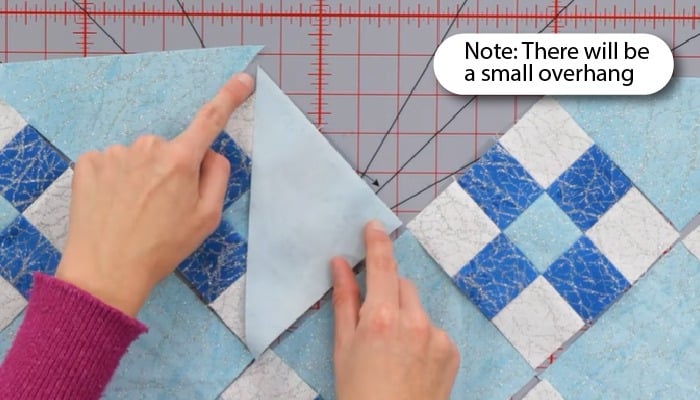
When sewing the E pieces, line up the triangle point with the corner where the 9-patches meet. A small overhang is expected. We’ll trim it later!
Now that your diagonal rows are sewn, it’s time to stitch those rows together to form the full table runner! Before sewing, press your seams flat to ensure a smooth finish. For cleaner intersections, I nested my seams and pinned where they meet. Then I headed back to the sewing machine and stitched the rows together!
*Nesting seams means pressing seam allowances in opposite directions so they “lock” together like puzzle pieces.*
Once your rows are sewn together, you can stop here or add borders as I did! I added a double border for extra framing.
To make borders easier:
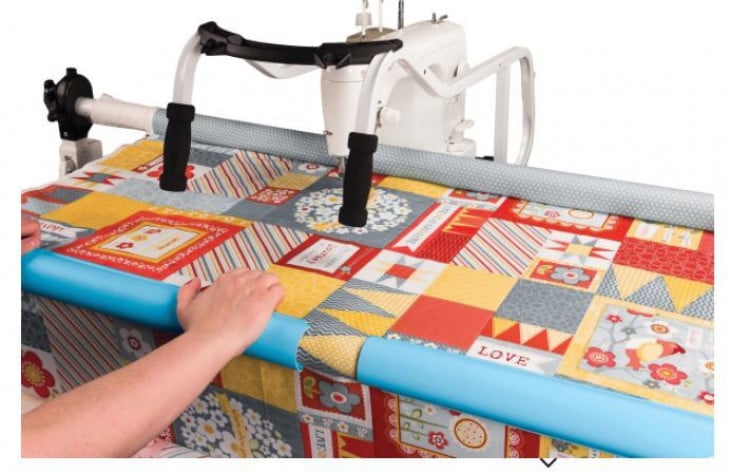
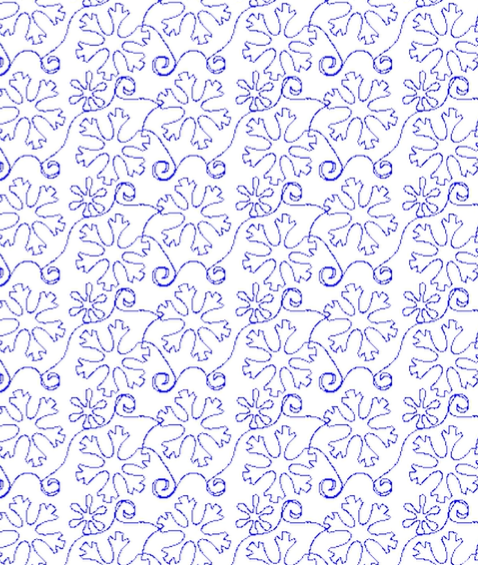
Once your top is complete, it’s time to quilt!
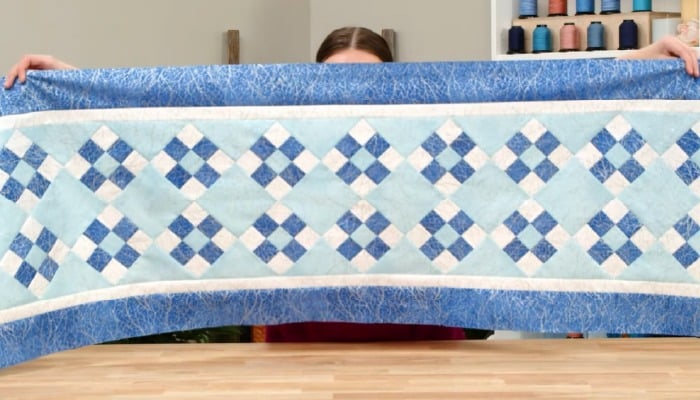
For mine, I used the Snowflake Pantograph from the Grace Company Design Store, which adds the perfect winter touch.
.
After quilting, you can bind your runner, and you're all done! I love how this project turned out. It became such a cozy accent piece in my home, and I honestly think it would make the sweetest handmade gift.
Get the FREE pattern here! : Link
Link to the Youtube Tutorial: Quilt a Cute and Easy Winter Table Runner
A reliable cutting tool for clean, precise fabric cuts.
Helpful for keeping cuts accurate and blocks consistent throughout the project.
A compact machine that’s easy to work with for piecing and quilting smaller projects.
Provides plenty of space for trimming fabric and preparing quilt pieces.
If you make one, share it with us!
Use #GraceWinterTableRunner and tag us on social media; we’d love to see your beautiful creation.
For more projects like this, be sure to follow Grace Company online. We’re always sharing new ideas, patterns, and inspiration!
For over 25 years the Grace Company has been the leading manufacturer of high quality quilting frames and quilting accessories. What truly sets The Grace Company apart from other competitors is its level of quality, value, and experience toward all their endeavours. From products to external and internal customer experience, the Grace Company responds to market and customer needs and continues to lead the quilting industry. Grace Company frames and hoops are designed to be easy to build and compatible with most major quilting machines. They'll have the quilting product you need.