Free shipping on orders over $100 don't wait to Save huge on your next machine purchase!

Shop now

Blog

Our Latest News

How to Make a Half-Square Triangle Quilt Block Three Ways

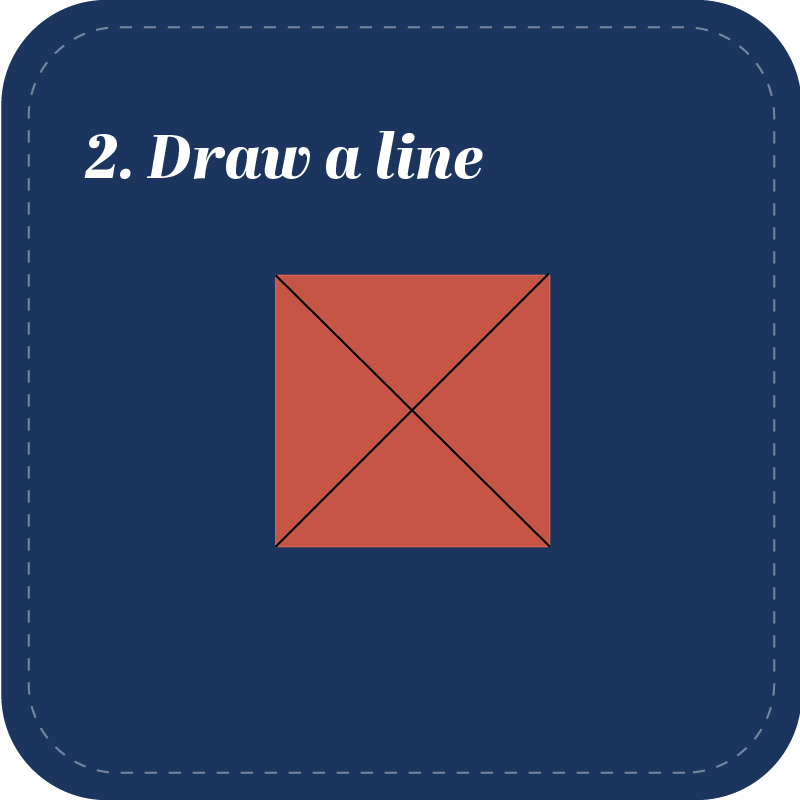
Half-square triangles are one of our favorite blocks here at Grace Company! With this block, you can create complex-looking quilt tops as a total piecing beginner. Depending on the fabric you choose and the way you lay it out, you can create a variety of different patterns. Half-square triangles are also the perfect choice for scrap-busting projects, because you don't need a lot of fabric to make this block, and it looks great with scrappy, mosaic-esque designs. 

Prefer to learn with a video instead of a blog post? Check out this video that will show you each of the half-square triangle methods that we lay out below. If you're looking for more block ideas, we've covered a few different basic blocks in previous posts. Check them out: 

A Fabric-Cutting Essential for Every Quilt BlockCutting mats on a light blue background

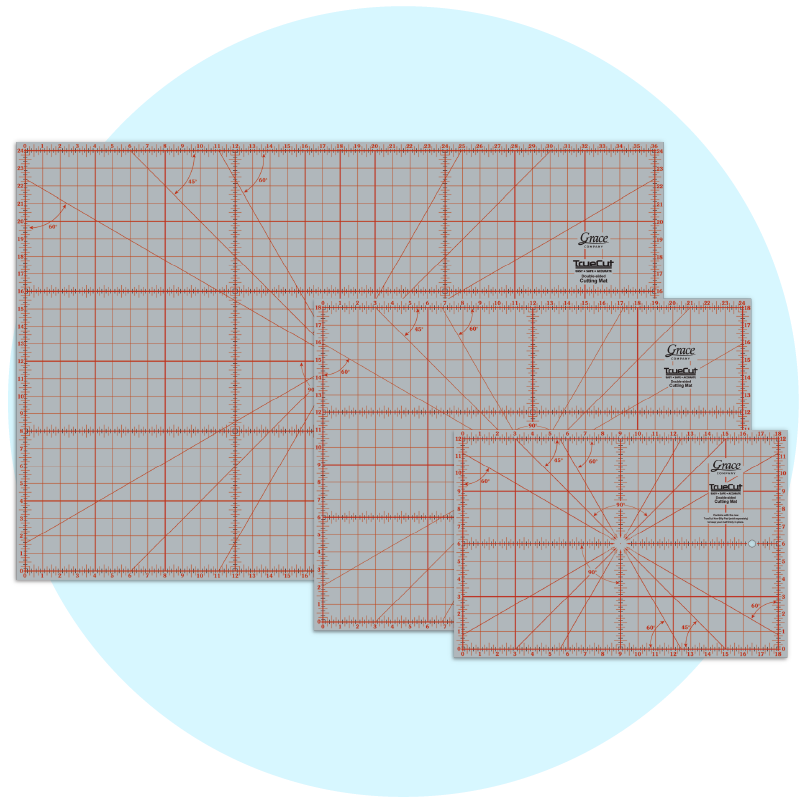
TrueCut Cutting Mats

Not only do these cutting mats protect your sewing table while you cut your fabric with a rotary cutter, they also help you ensure that your fabric is aligned properly before you make any cuts. 

  • Double-sided for extended use
  • Self-healing on both sides
  • Angle reference guidelines
  • Bias markings for bias strip cutting
  • Measured in 1/8" increments
  • Comes in 3 sizes
  • Easy-to-see colors

Learn More >>

Now let's get started!


Half-Square Triangles: Two at a Time Method

Half-square triangles 2 at a time size chart       What you'll need: two squares of fabric, each a different color.

  • Cut two fabric squares of the same size. The size of your squares will depend on the desired size of your finished blocks. Use the chart above to determine what size you should cut your squares.


1. Layer

  • Lay your fabric squares one on top of the other, right sides together. 

2. Draw a Line

  • Use a washable marker, heat soluble fabric pen, or similar implement to draw a straight line from one corner to the opposite corner. Make sure to use a ruler so your line is nice and straight!

3. Sew

  • Do not sew directly on the line you've drawn. Instead, sew a seam 1/4" from either side of the line.

4. Cut

  • Use a rotary cutter to cut along the line you drew. 

5. Press

  • Unfold the resulting half-square triangles and press the seam toward the darker of the two fabrics. Make sure you press the right sight of your fabric too. 


Half-Square Triangles: Four at a Time Method

Half-Square Triangles 4 at a Time Size Chart       What You'll Need: Two fabric squares of two different colors

  • Cut two fabric squares of the same size. The size of your squares will depend on the desired size of your finished blocks. Use the chart above to determine what size you should cut your squares.


1. Layer

  • Lay your fabric squares one on top of the other, right sides together. 

2. Sew

  • Sew along each edge of the layered squares, leaving a 1/4" of seam allowance on all sides. 

3. Cut

  • Use a ruler and rotary cutter to cut a straight line from one corner to the other. 

4. Cut

  • Make the same cut through the opposite corners.

5. Press

  • Unfold the resulting half-square triangles and press the seam toward the darker of the two fabrics. Make sure you press the right sight of your fabric too. 

Half-square triangles 8 at a time size chart       What You'll Need: two fabric squares of two different colors

  • Cut two fabric squares of the same size. The size of your squares will depend on the desired size of your finished blocks. Use the chart above to determine what size you should cut your squares.

1. Layer

  • Lay your fabric squares one on top of the other, right sides together. 

2. Draw a line

  • Use a washable marker, heat soluble fabric pen, or similar implement to draw a straight line from one corner to the opposite corner. Do the same with the opposing corners. Make sure to use a ruler so your lines are nice and straight!

3. Sew

  • Do not sew directly on the lines you've drawn. Instead, sew a seam 1/4" from either side of both lines.

4. Cut

  • Use a ruler and rotary cutter to cut along the lines you've drawn. 

5. Cut

  • Use a ruler and rotary cutter to cut all of the resulting blocks in half. 

6. Press

  • Unfold the resulting half-square triangles and press the seam toward the darker of the two fabrics. Make sure you press the right sight of your fabric too. 

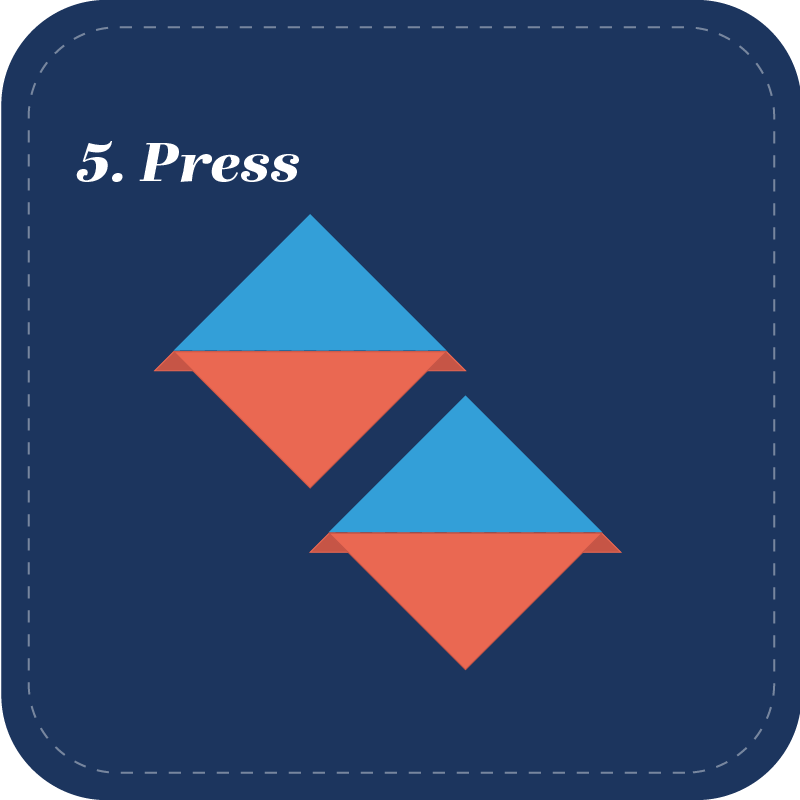
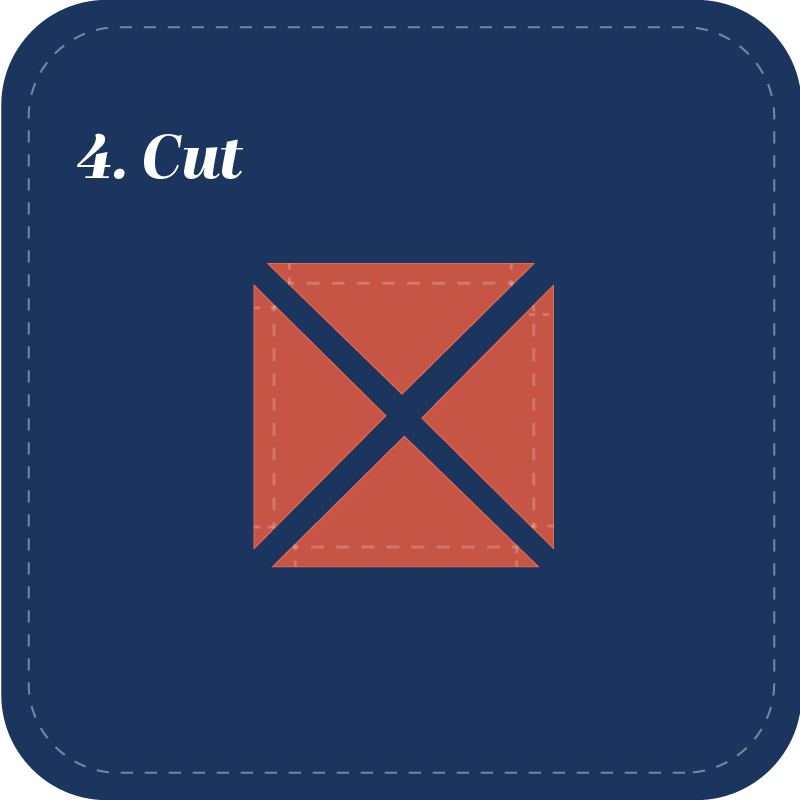
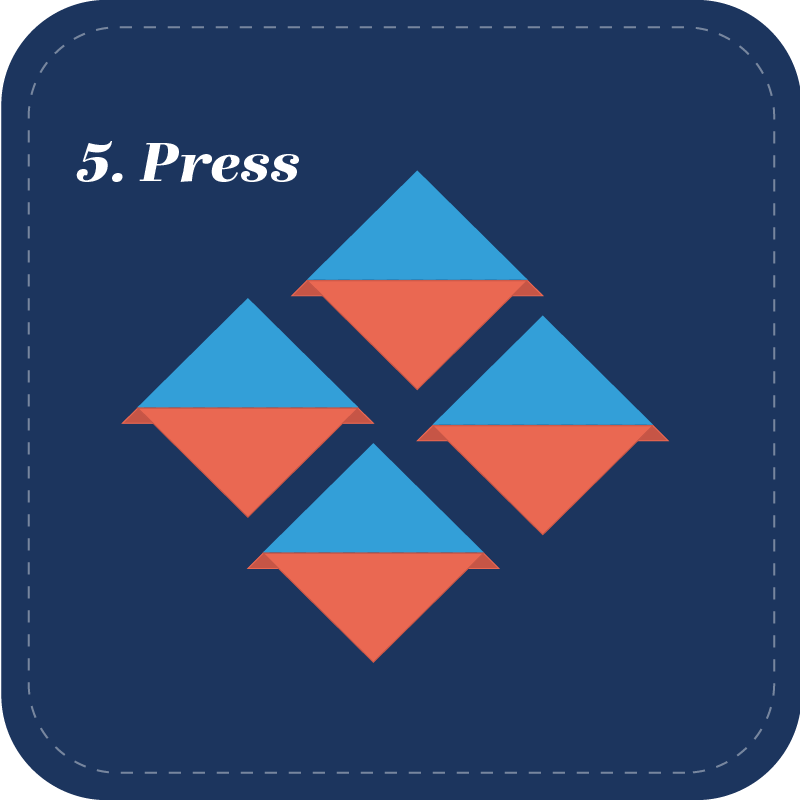
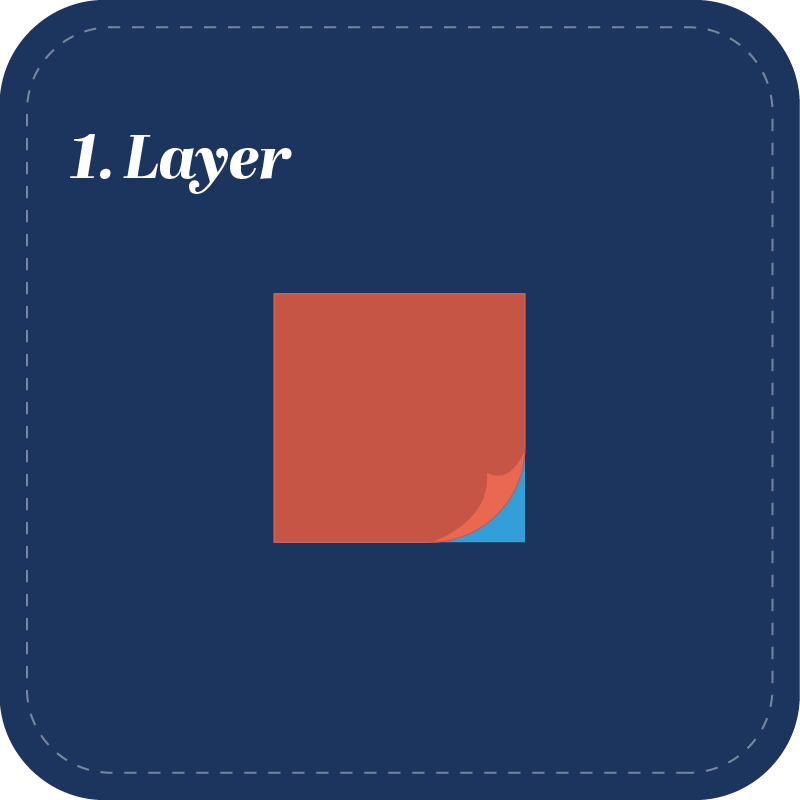
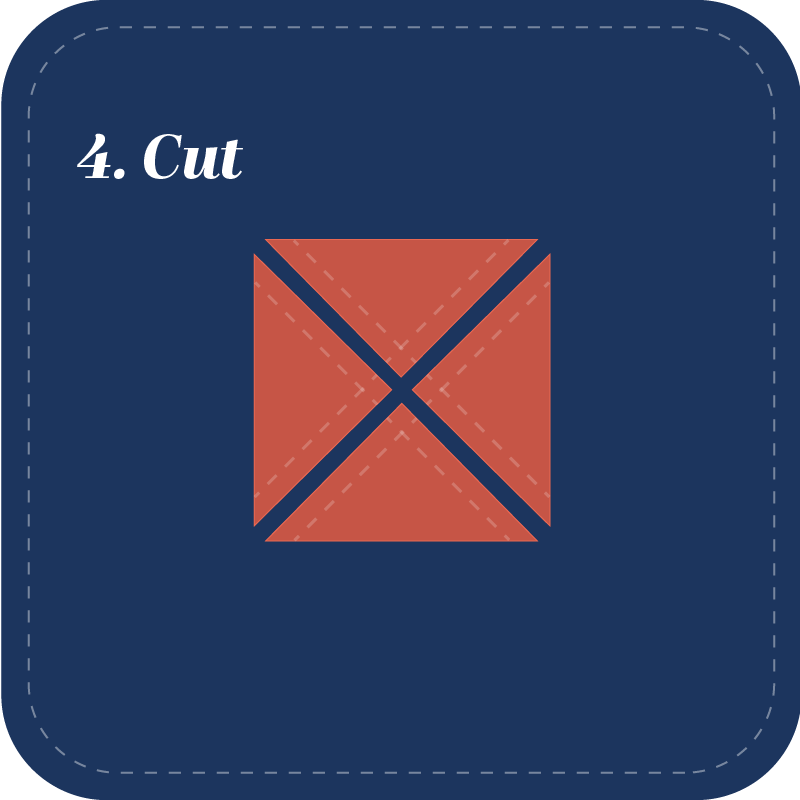
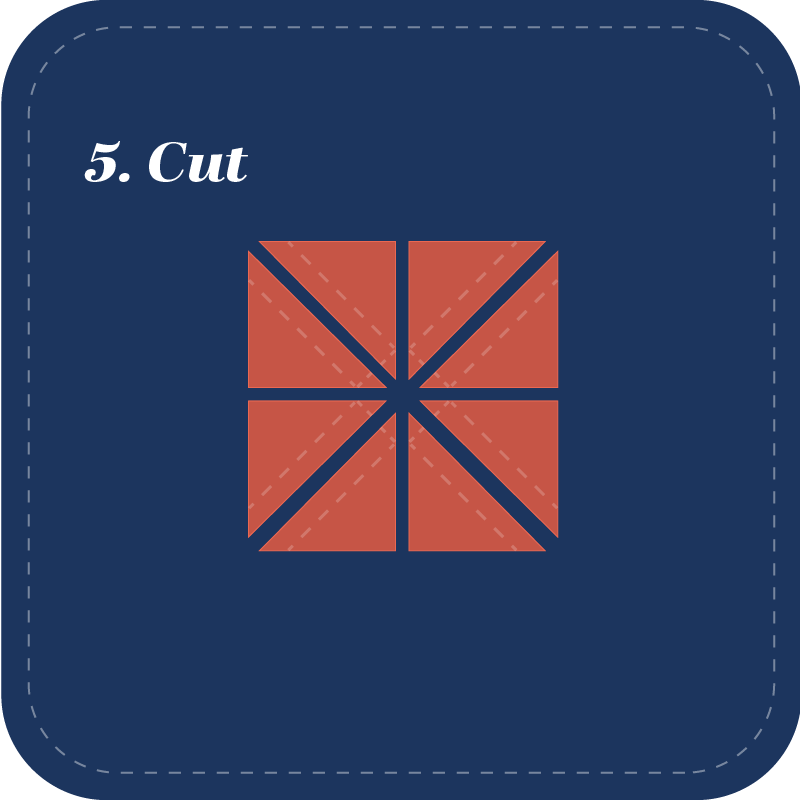
Half-square triangles are a fundamental block in quilting, and as you can see, there are many ways to make them. Whether you’re making just a few or preparing a whole stack for a larger quilt, mastering these methods will give you the confidence to experiment with new designs. From simple layouts to intricate patterns, half-square triangles offer endless possibilities for creativity.

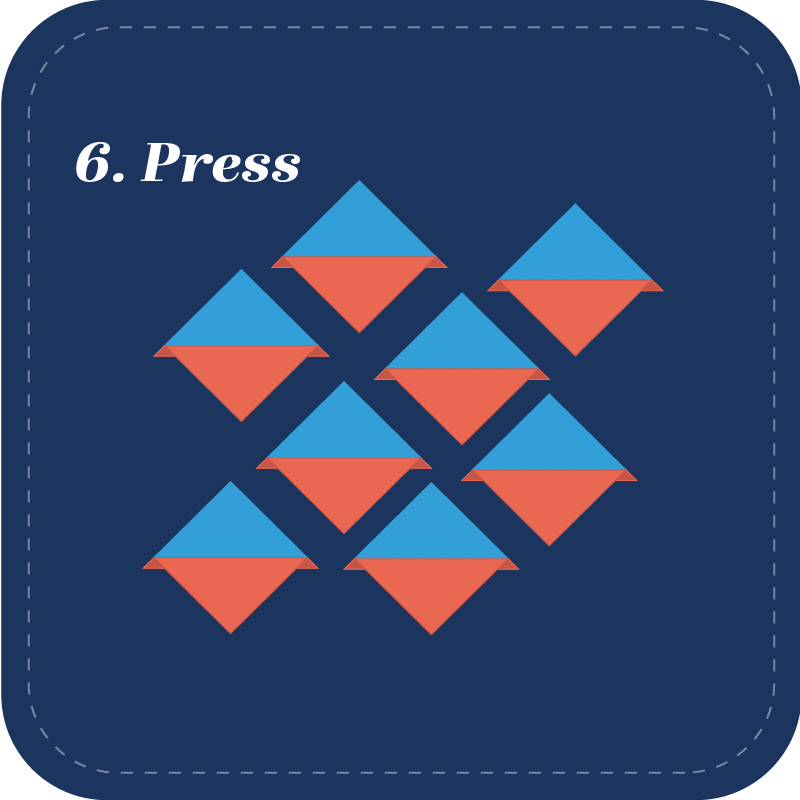
If you're new to quilting, this block is a fantastic place to start! Practice your half-square triangles to build essential skills and play with color, contrast, and layout. No matter how you arrange them, half-square triangles can bring your quilt ideas to life in unique and exciting ways. So grab your fabric, start stitching, and let your creativity take the lead!

Share this Post:

Posted by The Grace Company

logo

For over 25 years the Grace Company has been the leading manufacturer of high quality quilting frames and quilting accessories. What truly sets The Grace Company apart from other competitors is its level of quality, value, and experience toward all their endeavours. From products to external and internal customer experience, the Grace Company responds to market and customer needs and continues to lead the quilting industry. Grace Company frames and hoops are designed to be easy to build and compatible with most major quilting machines. They'll have the quilting product you need.

Related Posts: